
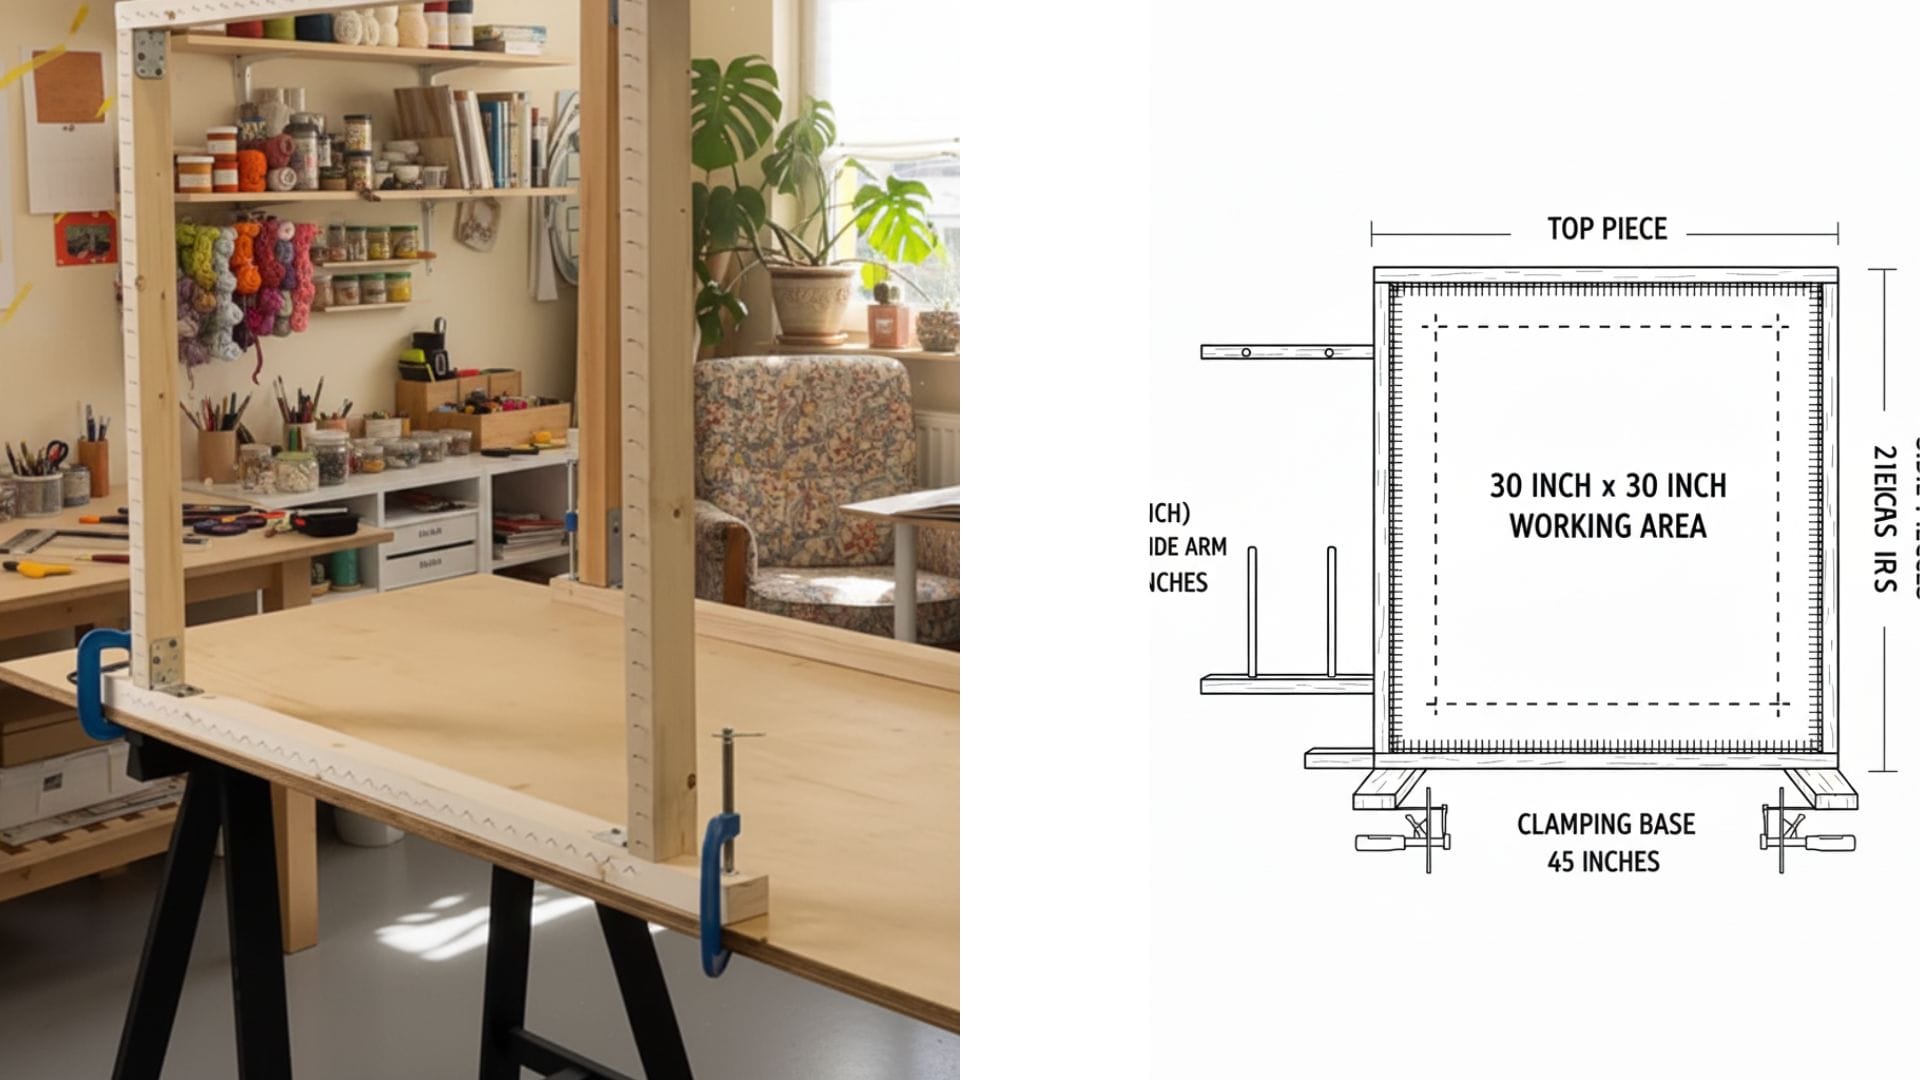
A tufting frame is the foundation of your rug-making setup. Building your own frame lets you choose the size of your working area and create a setup that fits your available space.
This DIY tufting frame guide shows you how to build a simple, sturdy frame for beginner and home tufting setups.
See the best tufting frames if you prefer a ready-made option
Materials You Need to Build Your Frame
Choosing Lumber for Your Tufting Frame
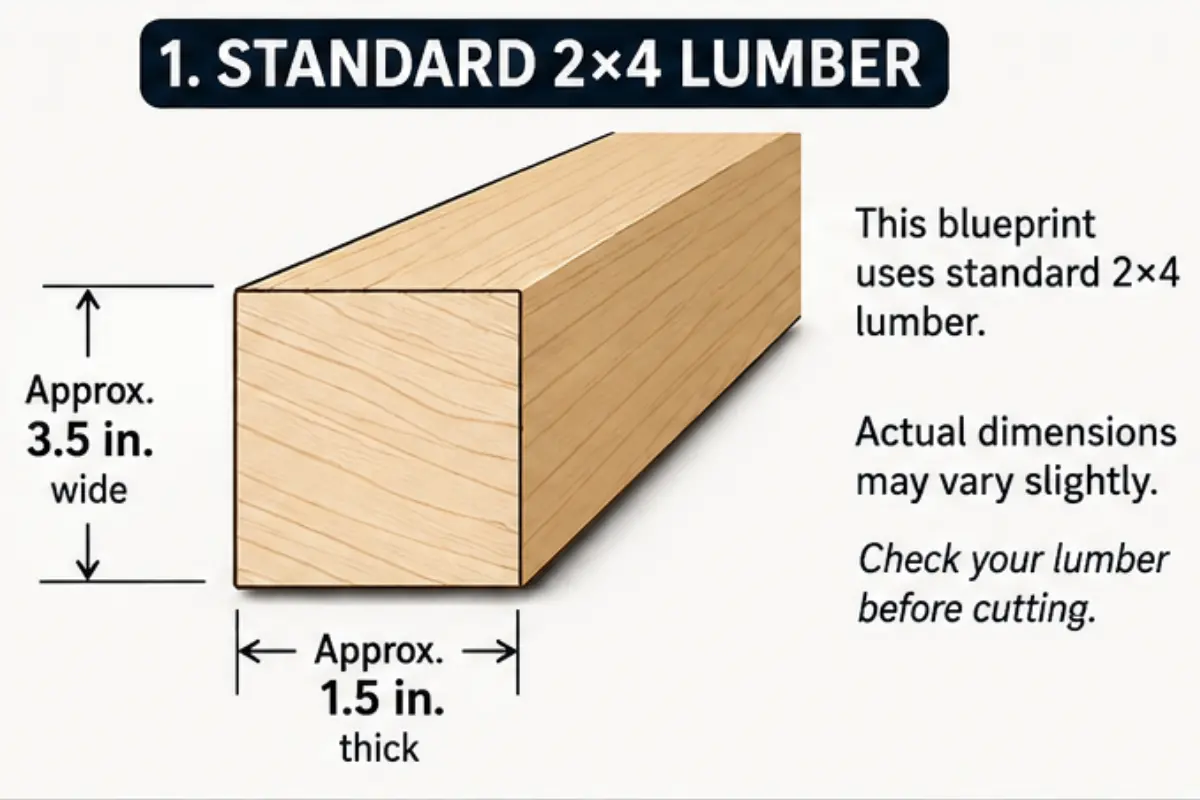
When primary tufting cloth is stretched across a frame, it places tension on the wooden rails. Using sturdy lumber helps reduce flexing and gives you a more stable surface while you work.
This blueprint uses standard 2×4 lumber, which is approximately 1.5 inches × 3.5 inches in actual dimensions. It’s widely available and provides a practical starting point for a home tufting frame.
DIY Frame Materials List
The items below are the exact materials required for this blueprint. For direct purchase links and pricing, please visit our materials list:
- Lumber (Structural Rails): 2×4 (approx. 1.5″ x 3.5″ actual) Two 8-foot-long pieces
- Note: This material is required to cut the two 36-inch side rails, one 36-inch top rail, one 42-inch extended bottom rail, and one 9-inch yarn guide arm.
- Corner Braces: 4 x 90-degree L-Brackets
- Long Fasteners: Approx. 16 x 2.5 inch Deck Screws (e.g., #10 or #12)
- Required for securing the main corners.
- Gripping Hardware: Carpet Tack Strips or Gripper Strips
- Quantity: Sufficient length to line the full interior perimeter (approx. 12 feet total, recommend buying two packs of three 4-foot strips).
- Tack Strip Fasteners: Small Finishing Nails or a Heavy-Duty Staple Gun (with staples)
- Required to secure the tack strips to the wood.
- Safety Essential: Thick protective foam or another suitable protective covering
- Use to cover exposed tack-strip points when the frame isn’t in use.
- Yarn Guide Hardware: 2 x Eye Hooks or M5 Eyelet Bolts
Tools You’ll Need
Gathering these items before starting Step 1 will ensure a smooth assembly process:
- Cutting: Hand Saw, Circular Saw, or Hack Saw (or utilize a hardware store’s cutting service).
- Drilling/Fastening: Electric Drill or Impact Driver (for screws and pre-drilling).
- Measurement: Measuring Tape, Carpenter’s Square or Speed Square (essential for confirming the 90-degree corners).
- Alignment: Level (for checking alignment).
- Securing: C-Clamps (recommended for securing the 42-inch base rail to your work table).
- Finishing: Sandpaper (or electric sander) to smooth sharp edges and splinters.
- Tack Strips: Hammer (if using nails for tack strips) or Heavy-Duty Staple Gun.
How to Build Your Tufting Frame
Calculate and Cut Your Lumber
While you can purchase lumber pre-cut at a hardware store, if you cut it yourself, ensure the cuts are clean and accurate. Try to keep your cuts straight and consistent so the pieces fit together cleanly during assembly.
- Lumber Cuts Required: Two 36-inch side rails, one 36-inch top rail, one 42-inch bottom base rail, and one 9-inch yarn guide arm.
Optional: Protect the Wood
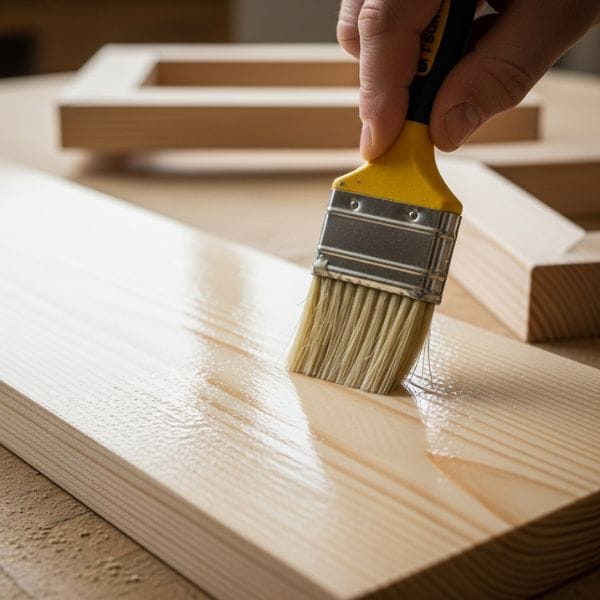
This step is optional. Sand any rough areas or splinters before assembling the frame. If you choose to apply a wood finish or sealer, follow the manufacturer’s application and drying instructions before attaching your tufting cloth or other materials.
Assemble the Frame Structure
Keeping the corners square will help the frame sit evenly and make it easier to stretch the tufting cloth consistently.
- Lay Out the Rails: Lay the three 36-inch rails and the 42-inch bottom rail on a flat surface in a square configuration.
- Position Corner Braces: Position your 90-degree L-Brackets at each corner joint.
- Pre-Drill Pilot Holes: Pre-drilling can help reduce the chance of the wood splitting when you install the screws.
- Secure Corners: Drive your 2.5 inch deck screws through the L-Brackets and into the connecting pieces.
Check Your Frame Is Straight
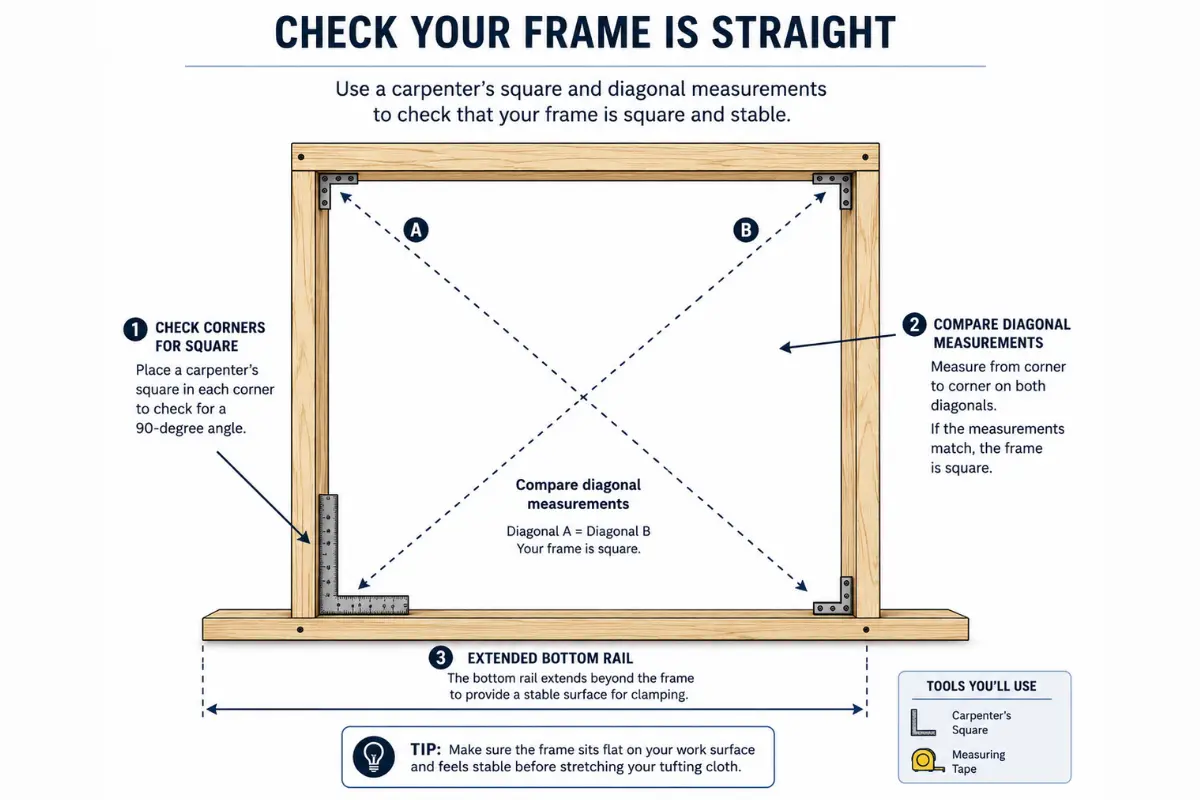
- Check for Square: Use a carpenter’s square to check the corners. You can also measure diagonally from corner to corner. Matching diagonal measurements are a useful indication that the frame is square.
- Check for Movement: Make sure the assembled frame feels stable before attaching the tufting cloth. Tighten the hardware or reinforce the corners if needed.
Attach the Yarn Guide
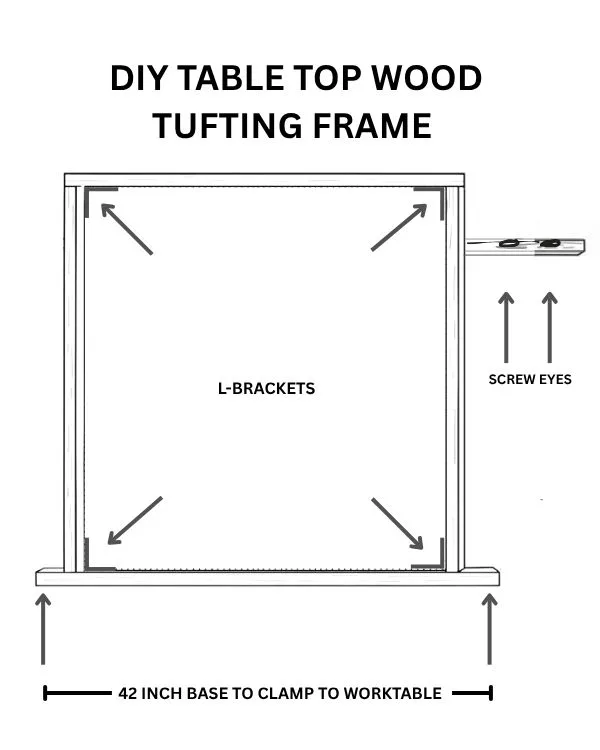
A yarn guide can help keep the yarn feeding toward your tufting gun while you work.
- Secure the Frame: Use appropriate clamps to secure the extended bottom rail to a sturdy workbench or table before tufting.
- Attach the Yarn Guide Arm: Install the yarn-guide arm and eye hooks so the yarn has a clear path toward your working area. Check that the yarn can feed freely without catching on the frame.
Add Tack Strips for Fabric Tension
Tack strips provide gripping points that help hold the primary tufting cloth in place while it’s stretched across the frame.
Optional Upgrade: Gripper Strips
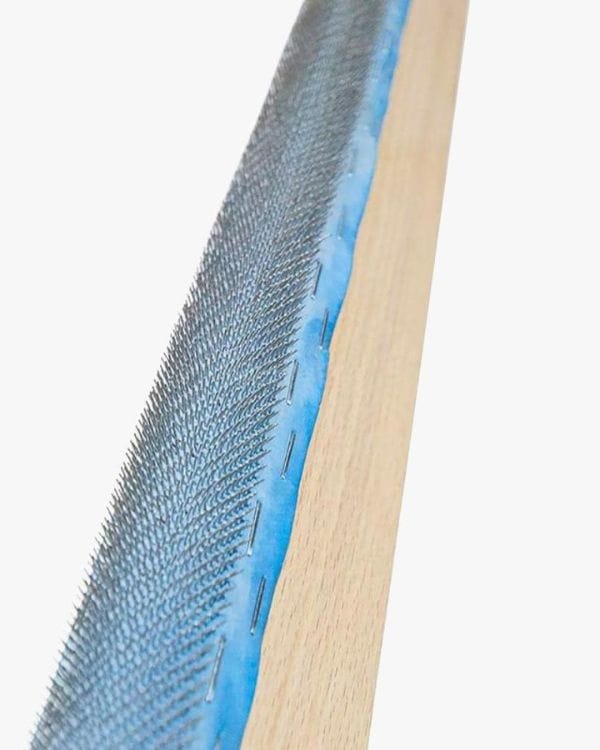
Specialized gripper strips are another option for holding tufting cloth on the frame. They generally cost more than basic carpet tack strips, so consider the type of frame you’re building, your budget, and the manufacturer’s installation instructions when choosing between them.
Install the Tack Strips
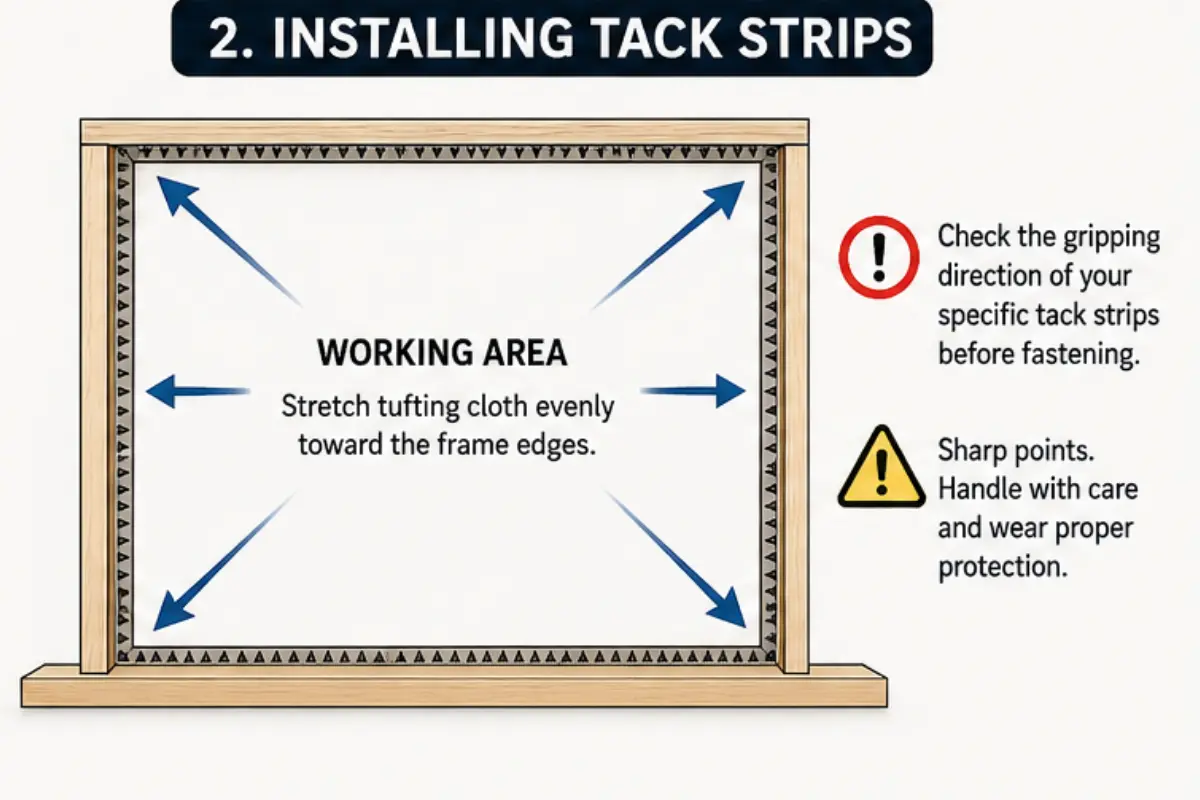
- Measure and Cut: Measure and cut the tack strips to fit around the working area of your frame.
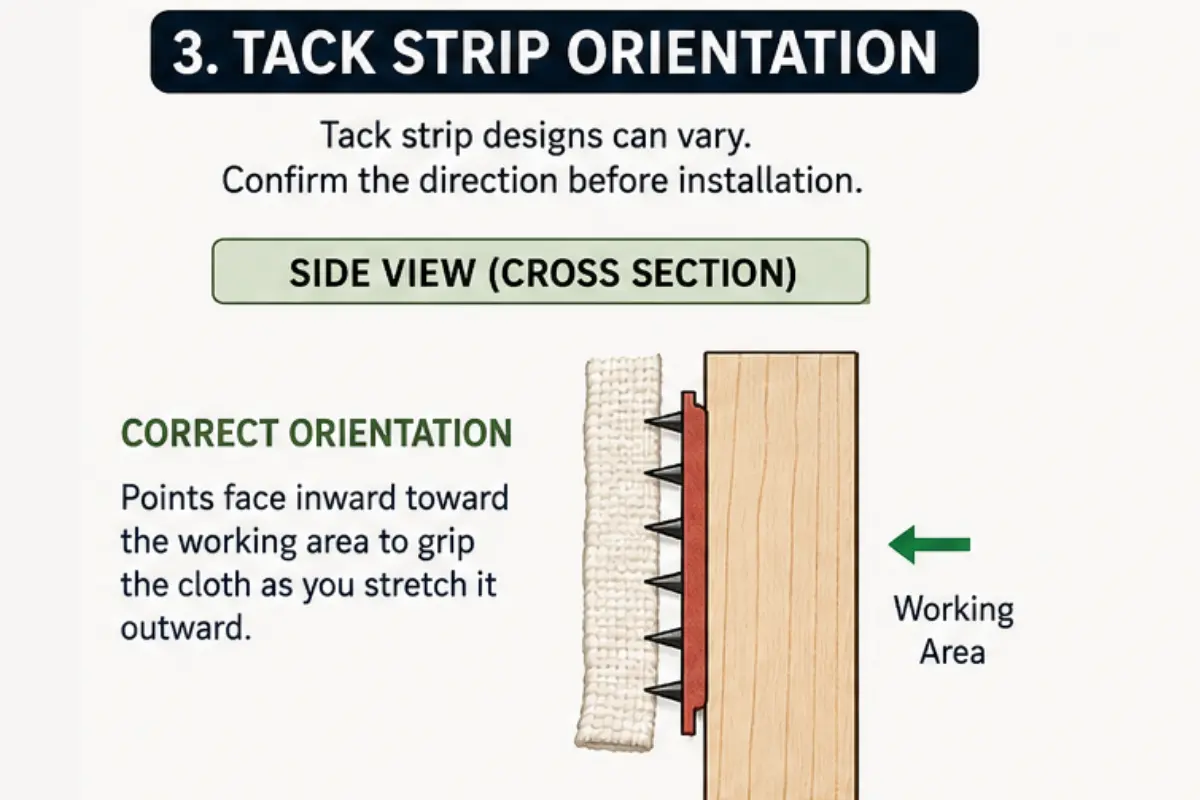
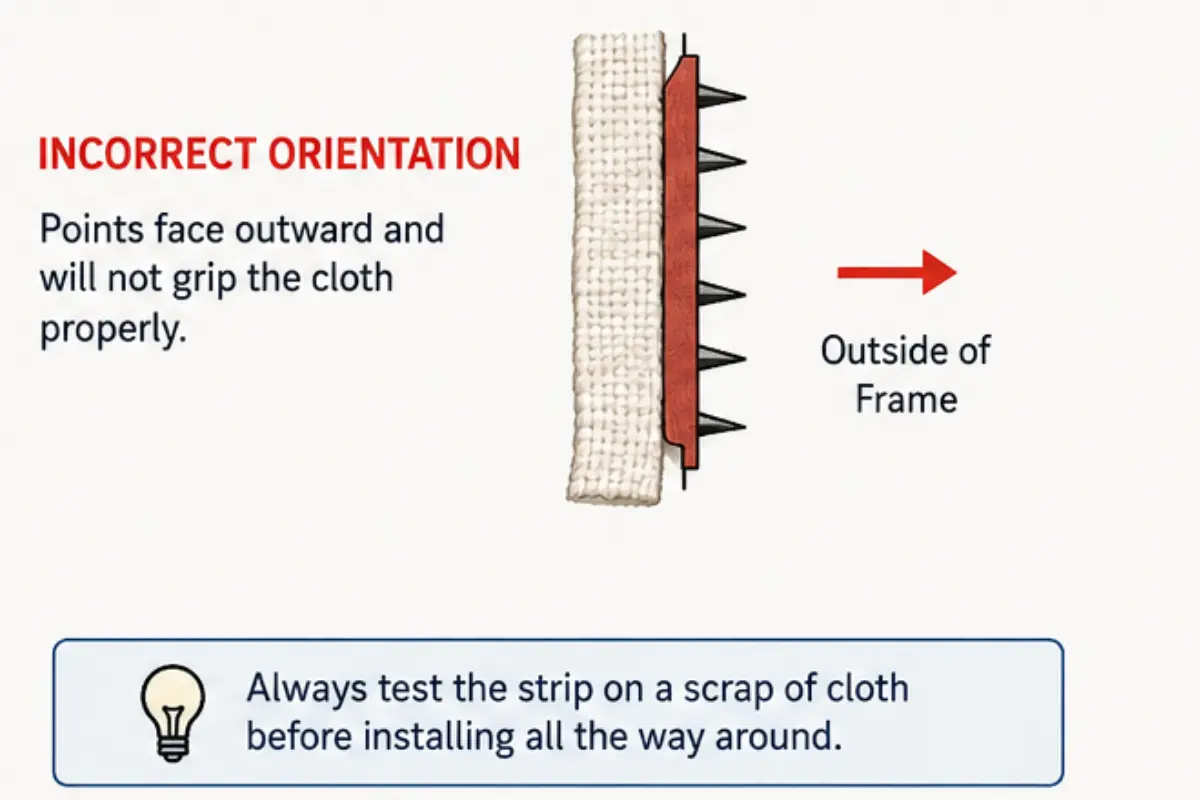
- Check the Tack Direction: Position the strips so they grip the tufting cloth as you stretch it outward across the frame. Tack-strip designs can vary, so check the strip orientation before fastening everything permanently.
- Secure the Strips: Fasten the strips securely to the wooden frame using an appropriate method for the strips and lumber you’re using.
Safety Tip: Cover Exposed Tack Points
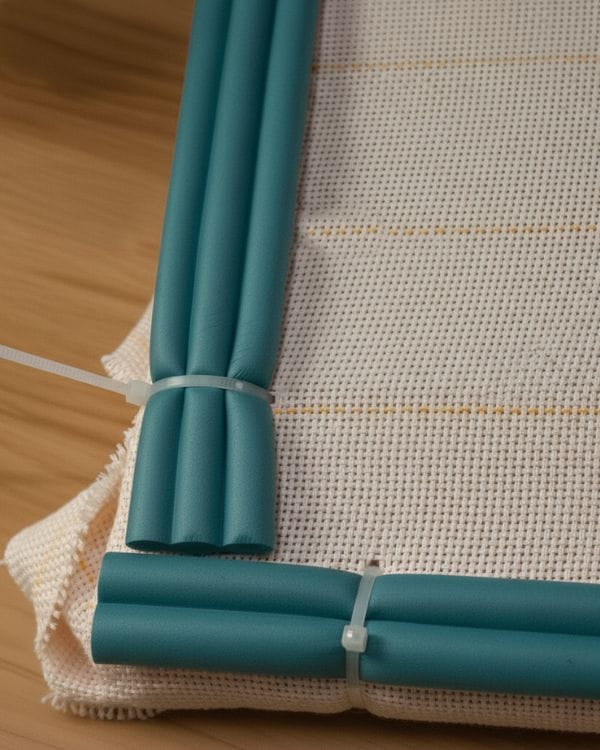
Tack strips contain sharp points that can cause injury. Handle them carefully and keep the exposed points covered with a suitable protective material whenever the frame isn’t being used. Keep the frame away from children and pets, and use appropriate hand and eye protection while cutting and installing the strips.
Next Steps After Building Your Frame
Stretching Your Tufting Cloth
Once your frame is assembled, the next step is stretching the primary tufting cloth evenly across the working area.
For step-by-step instructions on attaching and adjusting your fabric, see our complete guide:
How to Stretch Fabric on a Tufting Frame →
Building a Larger Tufting Frame
Larger frames place different demands on the structure and may require additional support or bracing. If you’re planning a larger working area, see our Large Tufting Frame Guide for additional frame-design considerations.
Maintenance and Storage
- Check your frame periodically for loose screws, brackets, or tack strips, especially after repeated use.
- Store the frame in a dry location when possible and inspect the wood for movement, damage, or loose hardware before starting another project.
FAQs: DIY Tufting Frame
How much does it cost to build a DIY tufting frame?
The cost depends on local lumber prices, the hardware you choose, and which tools you already own. Building your own frame can be an economical option if you already have basic cutting and drilling tools. Check current local prices for lumber, brackets, screws, tack strips, and clamps before starting your build.
See the Complete Rug Tufting Tools & Materials List →